


How to Invest in Your First Token Raise on Decubate, Even If You’ve Never Touched Crypto Before
Reading time:
Category:
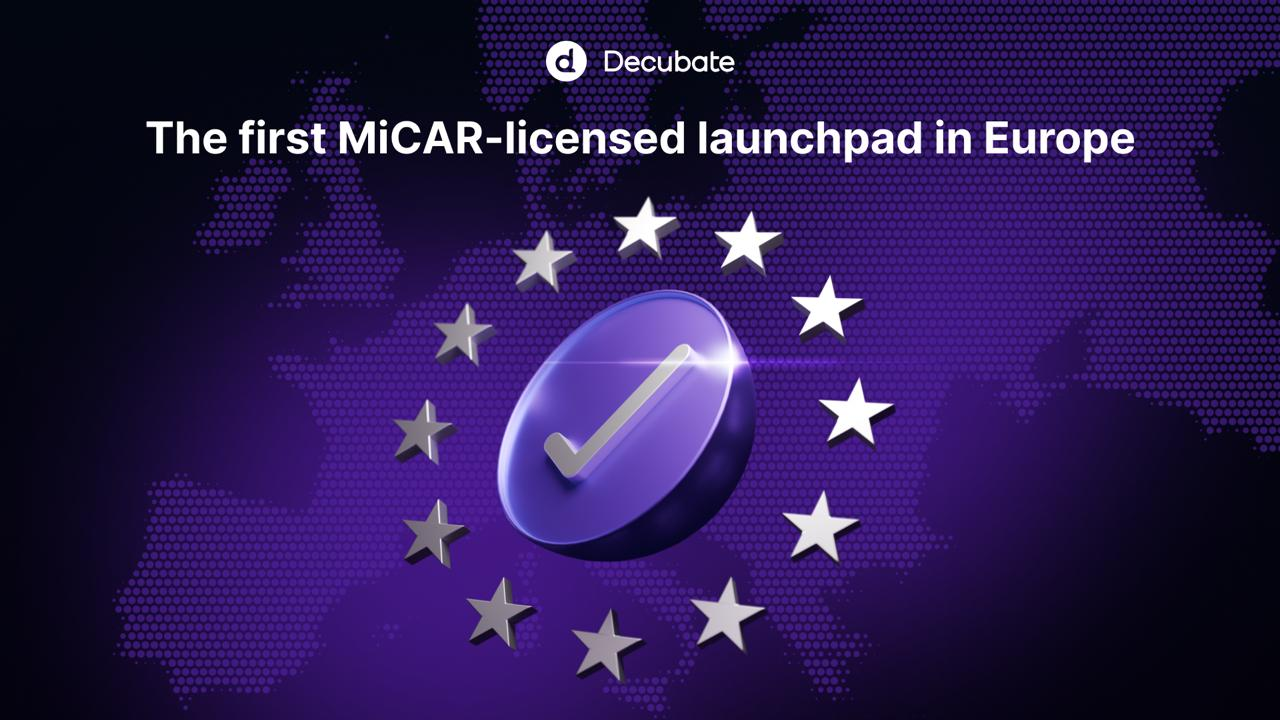
If you're new to crypto and Web3, you might feel like you're landing in a foreign country without a map. But good news, Decubate is here to simplify your journey. As the first MiCAR-licensed crypto launchpad in Europe, Decubate provides a legally regulated, transparent, and beginner-friendly way to invest in vetted Web3 projects before they hit the mainstream market. In this guide, you’ll learn how to go from zero to investor in a few simple steps, no prior crypto experience needed.
✅ What You’ll Need to Start:
- A device (laptop or smartphone)
- An email address
- A government-issued ID (for KYC)
- A crypto wallet (we’ll help you set it up)
- Free Decubate account
🛡️ Why You Can Trust Decubate
Decubate is the first crypto launchpad regulated under MiCAR (Markets in Crypto-Assets Regulation), the European framework that ensures:
- 🔐 KYC-verified investor onboarding
- 💸 Full transparency and a 100% refund policy on all tiers
- 🧾 Regulated under the Dutch Authority for Financial Markets (AFM)
Now, let’s walk through the full setup:
🎬 Step 1: Create a Free Decubate Account
This gives you access to our base tier and allows you to invest with no upfront cost.
📺 Watch the tutorial on How to Create an Account on Decubate
Or follow these steps:
- Go to platform.decubate.com
- Click Sign Up
- Enter your email, password, country, and agree to terms
- Verify your email (we’ll send you a code)
- Optional but recommended: enable 2FA (two-factor authentication)
🔗 Step 2: Connect Your Crypto Wallet (MetaMask)
A wallet is like your digital key to Web3. You’ll use it to log in and invest.
📺 Watch the tutorial on How to Install and Set Up MetaMask Wallet (Beginner Guide)
We recommend MetaMask, it's a browser extension that works like magic.
- Install MetaMask on Chrome/Firefox
- Create a new wallet and store your recovery phrase securely
- Once your wallet is ready, go back to platform.decubate.com and connect it
Supported wallets also include: Coinbase Wallet, Ledger, Trezor, and more.
🛂 Step 3: Verify Your Identity (KYC)
Required by law and part of MiCAR compliance. Takes just a few minutes.
📺 Watch the tutorial on how to Complete KYC on Decubate
Steps:
- Go to “Profile” → Click Start KYC
- Upload your ID
- Record a quick video or selfie as prompted
- Done, most verifications are completed within minutes
Once verified, you can now invest in token raises using our free Base Tier.
🪙 Step 4: Stake $DCB to Boost Your Allocation
Want higher allocations, early access, and better rewards? Stake our native token: $DCB
📍 Visit: platform.decubate.com/staking
You can buy $DCB from these exchanges:
- PancakeSwap (BSC)
- MEXC
- BitMart
- Gate.io
- Bitpanda
- BingX
- LBank
- CoinEx
- Aerodrome (Base)
🧠 Quick Explainer: What’s a Blockchain “Chain”?
A chain is simply a network where your wallet and tokens live.
Think of it like a train system, each chain is a different line, and your tokens need to be on the right track to show up and work properly.
🔗 $DCB exists only on two chains:
- BSC (Binance Smart Chain) – low fees, fast transactions
- Base (by Coinbase) – secure, low-cost Ethereum Layer 2
🏦 Withdrawing from Exchanges? Read This:
When buying $DCB from an exchange (like MEXC or Gate.io), you must:
- Withdraw $DCB to your wallet (MetaMask)
- Choose the right chain, either BSC (BEP-20) or Base
👉 This must match where you plan to stake or invest!
👀 Don’t See Your Tokens? Here’s Why:
If you don’t see $DCB after withdrawing, no panic.
On MetaMask, switch to the chain you used (BSC or Base), you'll likely see a "New token found" message.
If not, simply add $DCB manually using its token address (we’ll provide this on the platform or docs).
⛽ What’s “Gas” in Crypto?
Gas is a small fee you pay to complete any action on the blockchain, like staking, joining an IDO, or claiming tokens.
It’s not money for the project, it’s for the network (chain) to process your request.
Depending on the chain:
- ⛽ On BSC, you’ll need a little BNB
- ⛽ On Base, you’ll need a bit of ETH
Even $1–$2 worth is usually enough to cover multiple transactions.
💵 Don’t Forget: You Also Need USDC
To invest in a token raise, you’ll use USDC, depending on the project.
📌 Always check which chain the raise is happening on:
- If the IDO is on BSC, your USDC must be on BSC
- Same applies for the “Gas”, if the raise is happening on Arbitrum, you’ll need ETH on that chain to cover your transaction fees.
- If the IDO is on Base, your USDC must be on Base
✅ Make sure your MetaMask (or other wallet) is set to the correct chain before joining a raise.
🧱 Step 5: Stake to Level Up Your Tier
Tiering on Decubate is simple:
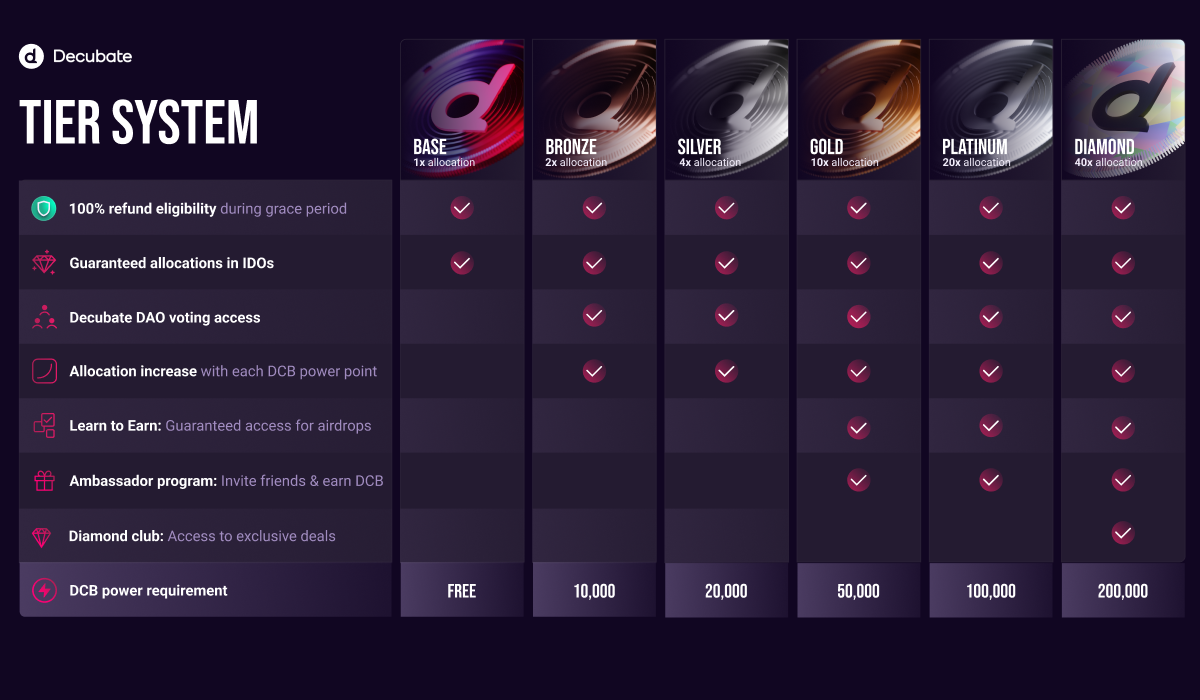
💯 All tiers include a 100% refund policy, no questions asked.
🎯 Step 6: Join a Token Raise (IDO)
Once you're verified and staked (optional), you’re ready to invest.
Go to the Launchpad page to view active and upcoming raises.
Each raise will show:
- Project details and tokenomics
- Minimum + maximum contribution
- How many spots your tier qualifies for
- Vesting schedule and claim dates
📌 Just connect your wallet, confirm your transaction, and you’re in.
🧾 Bonus: Why MiCAR Compliance Matters
Most launchpads operate in legal grey areas. Not Decubate.
As a MiCAR-authorized launchpad, Decubate gives both founders and investors the first-ever fully regulated token-raise experience in Europe.
This means:
- You're protected
- Projects are vetted
- The process is legal, compliant, and secure
🔐 Invest with confidence.
🔗 Ready to get started?
👉 Create your free account today
👉 Learn more about MiCAR compliance
👉 Stake $DCB and unlock your tier
